Configure template fonts
Every document generated by Docentric CE depends on fonts. When a template is rendered, the Docentric CE must be able to find and load all fonts used in that template. If a font is missing, the output may look different from what you designed in Word or Excel, or the generation may fail altogether.
Docentric CE already comes with a set of preinstalled fonts. We refer to these as system fonts. You can safely use them in your document templates without any extra setup.
However, many real-world templates rely on additional fonts. These can be corporate brand fonts, custom typography required by regulations, or fonts not included by default in the environment. When a template uses such a font and it is not available as a system font, Docentric CE needs a way to access it.
That is where custom fonts come in. Docentric CE allows you to upload and manage additional fonts so they can be used during document generation alongside system fonts. These fonts are packaged and stored in the environment and are available to all relevant document templates.
Configure template fonts
This article explains how to provide additional fonts, including how to create and manage custom font packages, so your generated documents always look exactly as intended.
Prerequisites
- You have the Docentric CE Administrator security role assigned.
- You have opened Settings area of Docentric CE application
- You have prepared a ZIP file containing all your custom font files (size up to 128 MB)
Check available fonts
Before uploading a new font package, verify which fonts are currently available in your environment.
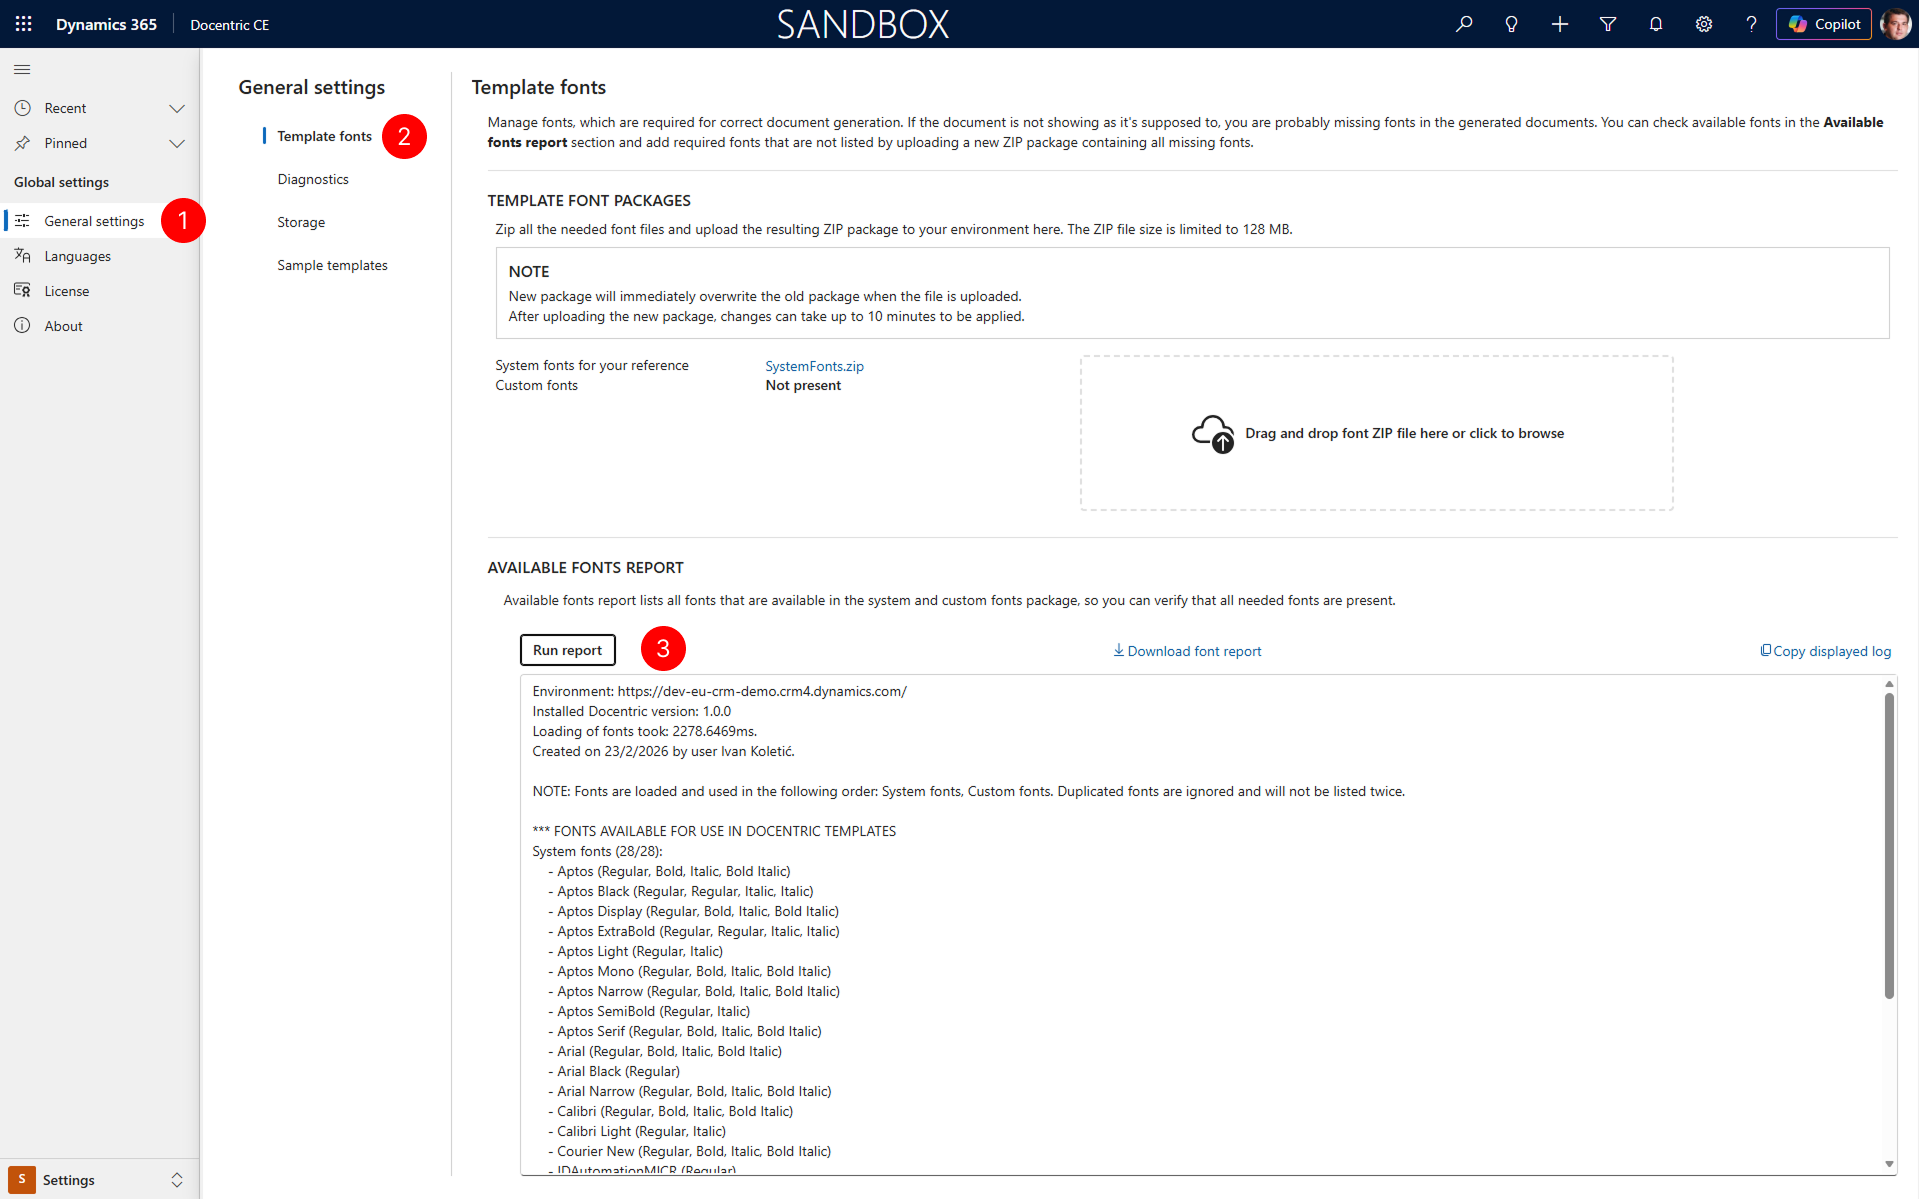
- In the site map of Settings area, select General settings.
- Under General settings, select the Template fonts tab.
- On the Template fonts page, locate the AVAILABLE FONTS REPORT section. Select Run report to generate a list of all system fonts and custom fonts available in your environment. Review the report to confirm whether the required fonts are present.
Upload a custom font package
If the fonts you need are missing, upload a new ZIP package containing the missing font files.
WARNING
The new fonts package will overwrite the existing fonts package when the file is uploaded.
If you want to keep any of the current fonts, first download the current custom fonts file (select it to download), then merge the fonts you want into your new ZIP package and upload it.
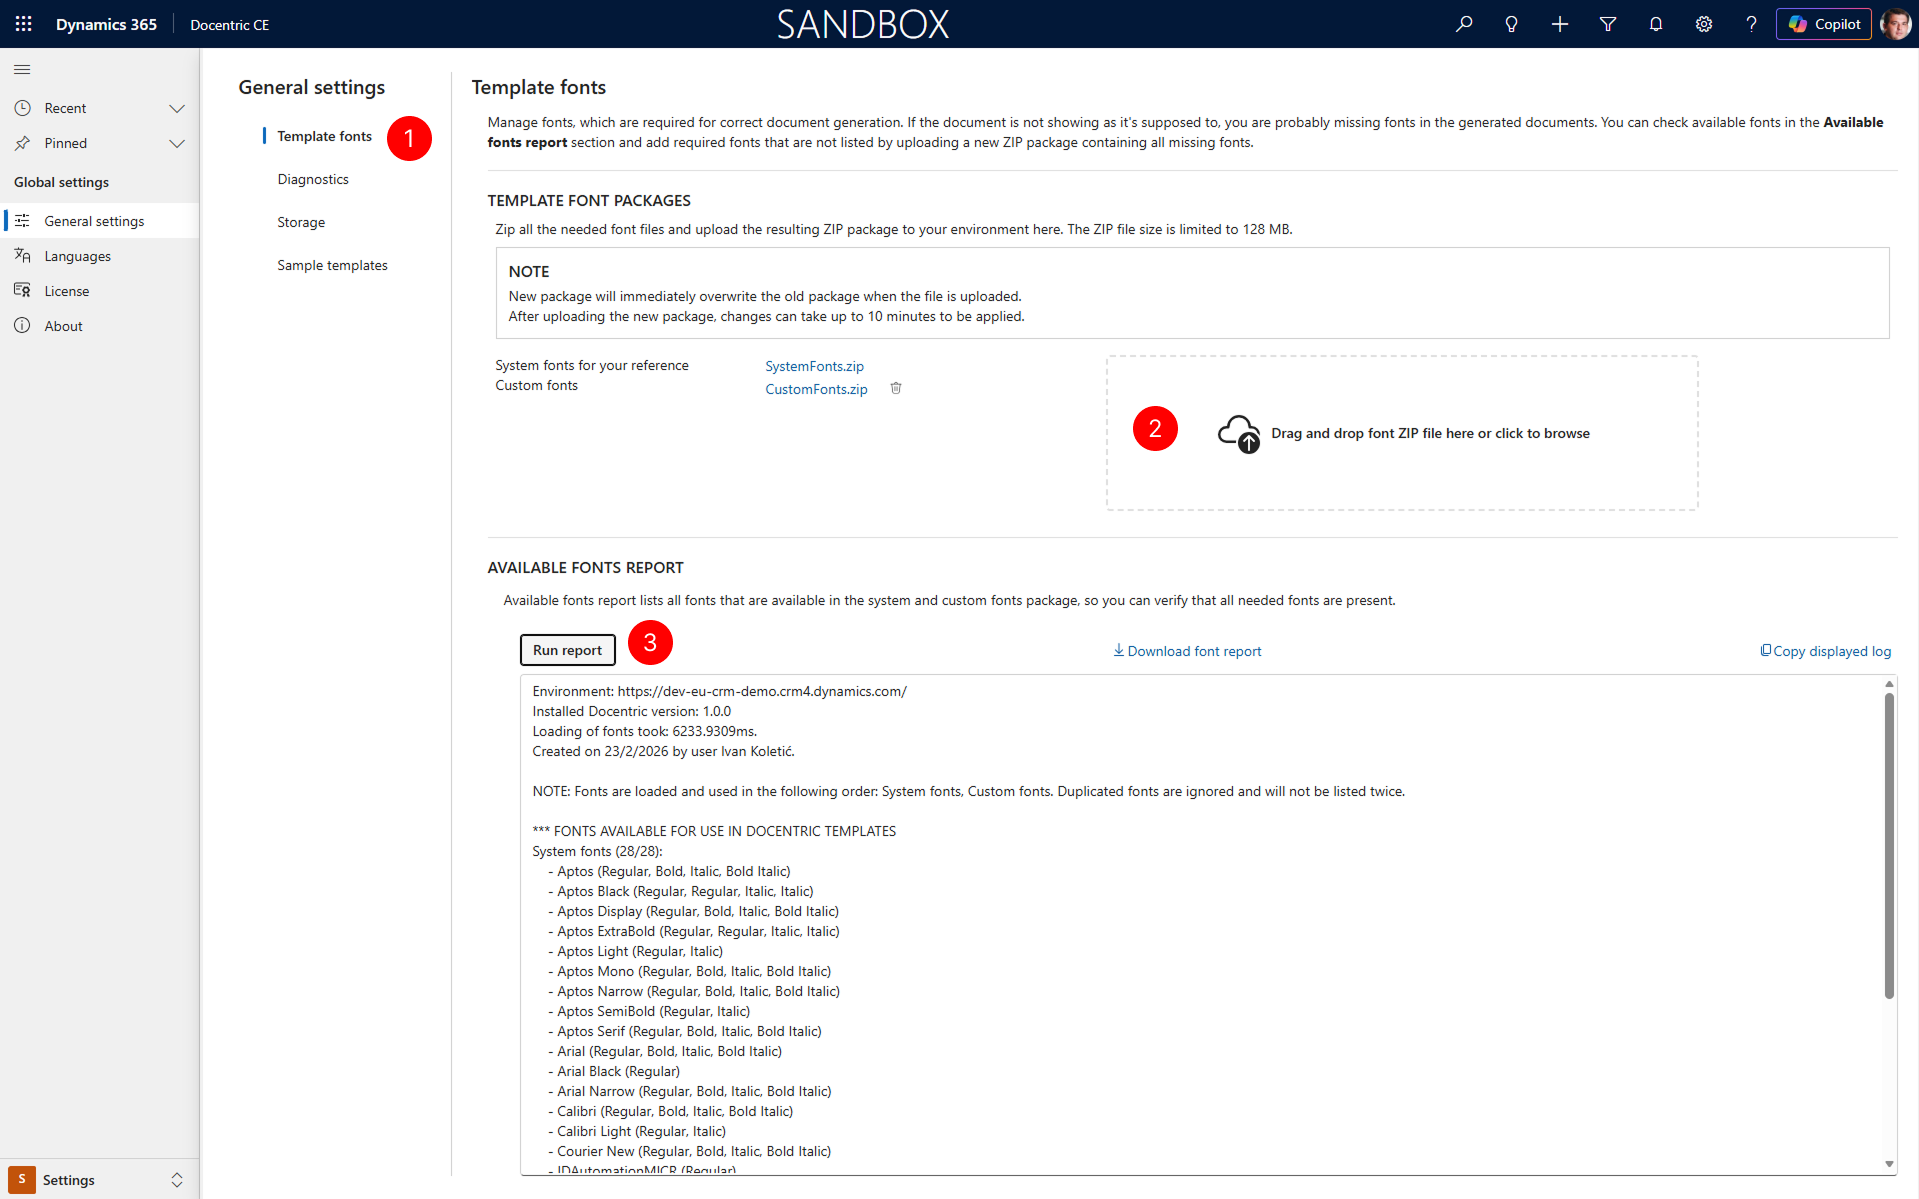
On the Template fonts page, locate the TEMPLATE FONT PACKAGES section. In the upload area, drag and drop your font ZIP file, or select click to browse to choose the file from your computer.
Wait for the upload to complete.
NOTE
After uploading the new package, changes can take up to 10 minutes to be applied.
To confirm custom fonts are available, select Run report in the AVAILABLE FONTS REPORT section. Review the report under Custom fonts to verify that your uploaded fonts are listed.
Next steps
After configuring template fonts, you can use them in your Document Templates. For more information about designing templates, see Word Template Designer.