Field tagging element
Use the Field tagging element to represent a text, number or date-time data field from the Data Source. You can control how number or date-time values are formatted when displayed in a generated document.
Prerequisites
- Template Designer installed. For more information, see Install Docentric Designer.
- A document template set up with a Data Source Package (DDSP) loaded. For more information, see Set up a document template.
- A Field tagging element inserted in your template. For more information, see Tagging elements overview.
- An Elements tree pane shown. For more information, see Elements tree pane
Bind Field tagging element to data
You can only bind Field tagging elements to data fields that can be represented as text, number or date-time values. If data needs to be formatted in a specific way, you can apply formatting options after binding the tagging element to data, or use a Power Fx Format() function.
For detailed steps, see Bind tagging element to data.
Use expressions in Field tagging elements
Field tagging elements can be bound not just to simple paths consisting of data fields (e.g., Quote.Account.Address), but also to Power Fx expressions that can perform complex calculations, data shaping and filtering.
To bind a Field tagging element to an expression, see Bind tagging element to data using Power Fx expressions
Format string data
Control how text data appears in the generated document by applying string formatting options.
- Select the Field tagging element to view its properties.
- In the Properties pane, locate the Formatting property and choose the format button to open the Format dialog.
- In the Format dialog, configure the string formatting options:
- No formatting - No formatting of how text case should be displayed
- HTML - Treat inserted text as HTML and interpret HTML appropriately.
- Choose OK to apply the formatting.

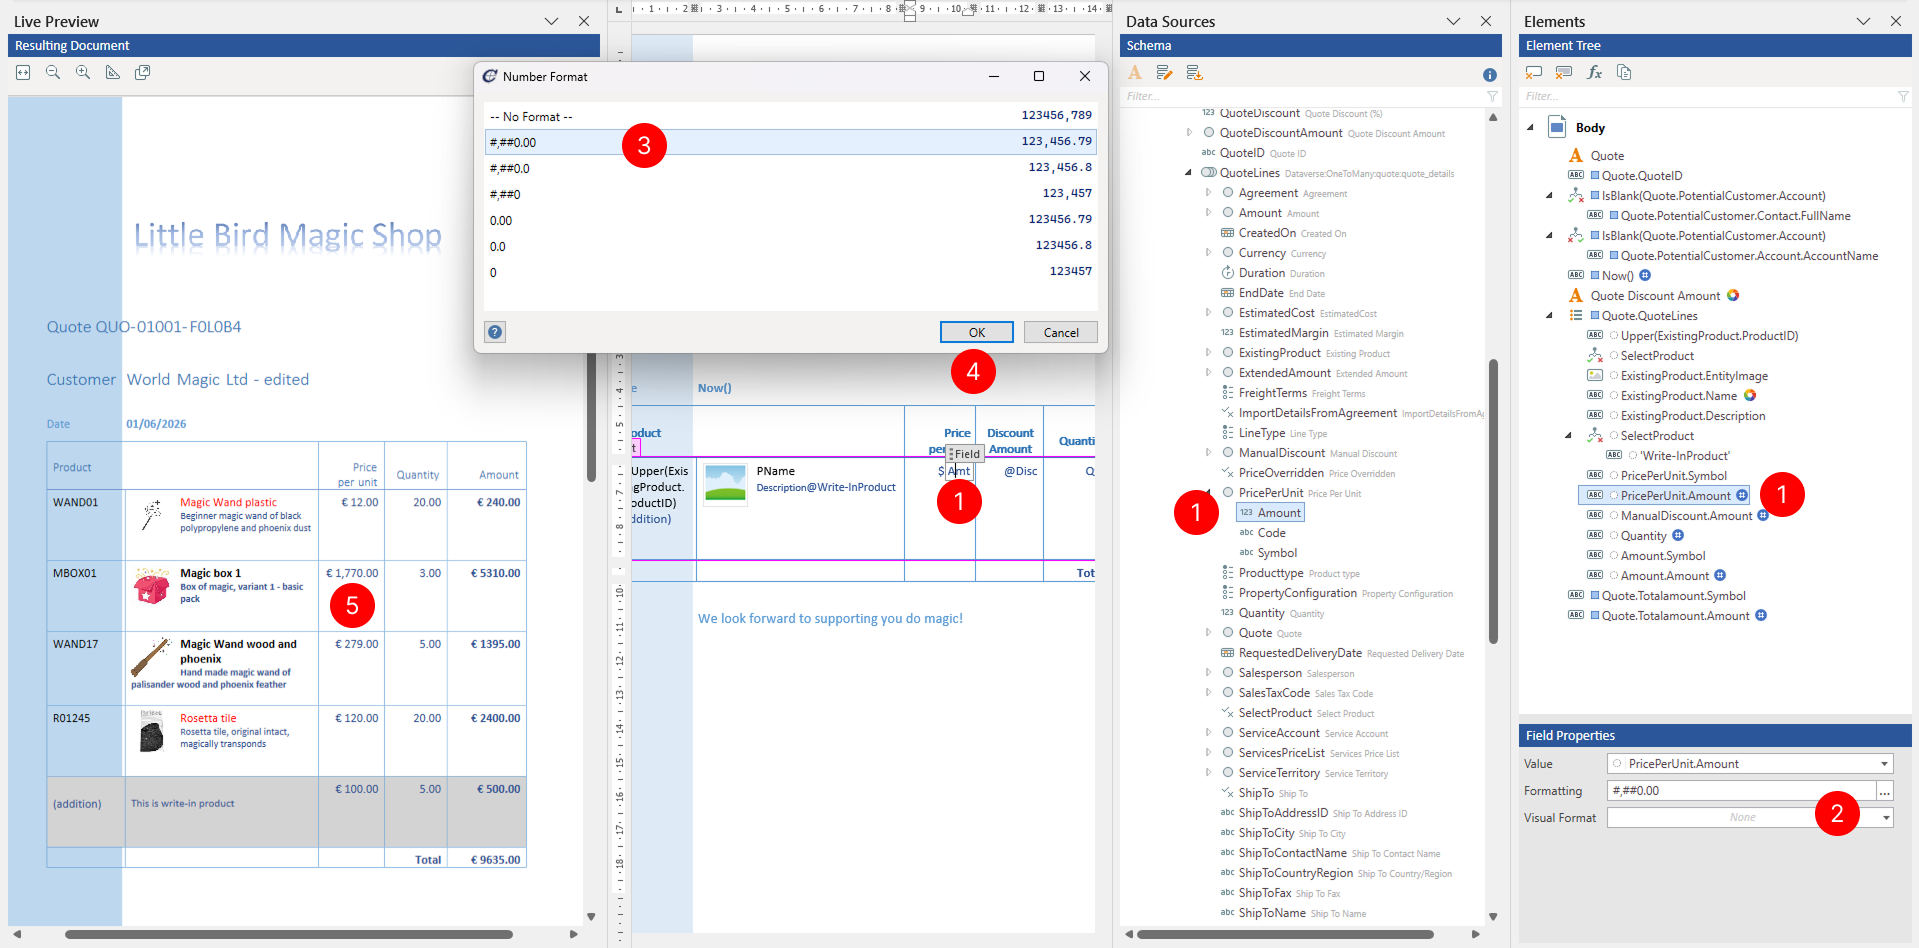
Format numeric data
Control how numeric data appears in the generated document by applying numeric formatting options.
- Select the Field tagging element to view its properties.
- In the Properties pane, locate the Formatting property and choose the format button to open the Format dialog.
- In the Format dialog, select among predefined numeric formatting options or enter custom format in Formatting property.
- Choose OK to apply the formatting.
NOTE
Numeric formatting is driven by the Preview language selected in the Preview group on the Docentric ribbon tab. The same numeric value may display differently based on the selected preview language culture settings. For example, numeric values can have different decimal and thousands separators.
Format date-time data
Control how date-time data appears in a generated document by applying date-time formatting options.
- Select the Field tagging element to view its properties.
- In the Properties pane, locate the Formatting property and choose the format button to open the Format dialog.
- In the Format dialog, select among predefined data and time formatting options or enter custom format in Formatting property.
- Choose OK to apply the formatting.

NOTE
Date-time formatting is driven by the Preview language selected in the Preview group on the Docentric ribbon tab. The same date-time value may display differently based on the selected preview language (culture) settings.
Apply visual formatting
You can specify visual formatting rules on the Field tagging element to control the visual appearance of related content in the generated document in a dynamic, data-driven manner. For detailed steps, see Apply visual formatting to tagging elements.