Apply visual formatting to tagging elements
Visual formatting enables you to dynamically control the appearance of document content based on data and conditions at document generation time. You can write data-driven rules that override statically-set document object visual formatting at document generation time. For example, you can change font size, color, background color, bold, italic, underline, and visibility of document objects like text, paragraphs, tables, rows, and cells. You can user Power Fx expressions to define visual formatting rules.
You can add visual formatting rules to any tagging element in your template. Each rule has three parts:
- Target Object: The document object to which the formatting applies (for example, a specific table cell, row, or the entire table).
- Format Property: The specific visual property to control (for example, font color, bold, italic, underline, font size, background color, visibility).
- Value Expression: A data-binding. It can also be a Power Fx expression that evaluates to the desired value for the selected format property.
The following table shows all possible combinations of visual formatting for target objects, format properties, and expected expression return value types:
| Target Object | Format Property | Expression return value type |
|---|---|---|
| Whole Table, Whole Table Row, This Table Cell Only | TextColor | Color: for example: Color.Red, Color.Blue... |
| Bold | Boolean: true or false | |
| Italic | Boolean: true or false | |
| Underline | Boolean: true or false | |
| Font Size | Integer: font size in points | |
| Background Color | Color: for example: Color.Red, Color.Blue... | |
| This Table Column | Visible | Boolean: true or false |
| Text inside tagging element | Bold | Boolean: true or false |
| Italic | Boolean: true or false | |
| Underline | Boolean: true or false | |
| Font Size | Integer: font size in points | |
| Text Color | Color: for example: Color.Red, Color.Blue... |
NOTE
The available target objects and properties depend on the position of the tagging element in the template. For example, if the tagging element is inside a table cell, you can apply formatting to the cell, row, or entire table.
TIP
Best approach to make table rows "invisible" is to filter the data bound to the tagging element that fills the table, so that only necessary rows will be processed and rendered in the output document.
Prerequisites
- Template Designer installed. For more information, see Install Docentric Designer.
- A document template set up with a Data Source Package (DDSP) loaded. For more information, see Set up a document template.
- A tagging element inserted in your template. For more information, see Tagging elements overview.
- Basic understanding of Power Fx expressions. For more information, see Power Fx formulas.
Hide table column
Use visual formatting to control properties such as table column visibility or formatting based on a condition.
Select the tagging element in your template or in the Elements pane.
In the Properties pane, locate the Visual formatting section to open Visual Format Overrides dialog.
Choose Add Visual Format Override (
 ) to create a new visual formatting rule.
In the Target Object dropdown, select the template object to which the formatting applies (for example, This Table Column in current example means column where tagging element is placed).
TIP
To hide the entire table column, apply it to a tagging element in the column header row, e.g. Label tagging element for column caption. This way, the column visibility condition will be evaluated only once for the whole table, and not for each row in the table.
In the Format Property dropdown, select the property you want to control (for example, Visible to control visibility).
In the Value field, enter a Power Fx expression that evaluates to the desired value. For example, below is Power Fx expression that will show or hide Discount Amount column based on it's value.
If(Quote.QuoteDiscountAmount.Amount > 0,  //when there is quote discount
  true,  //set Target property (Visible) to true, show column
  false  //otherwise, hide column
)
Choose the OK button to confirm the formatting rule.
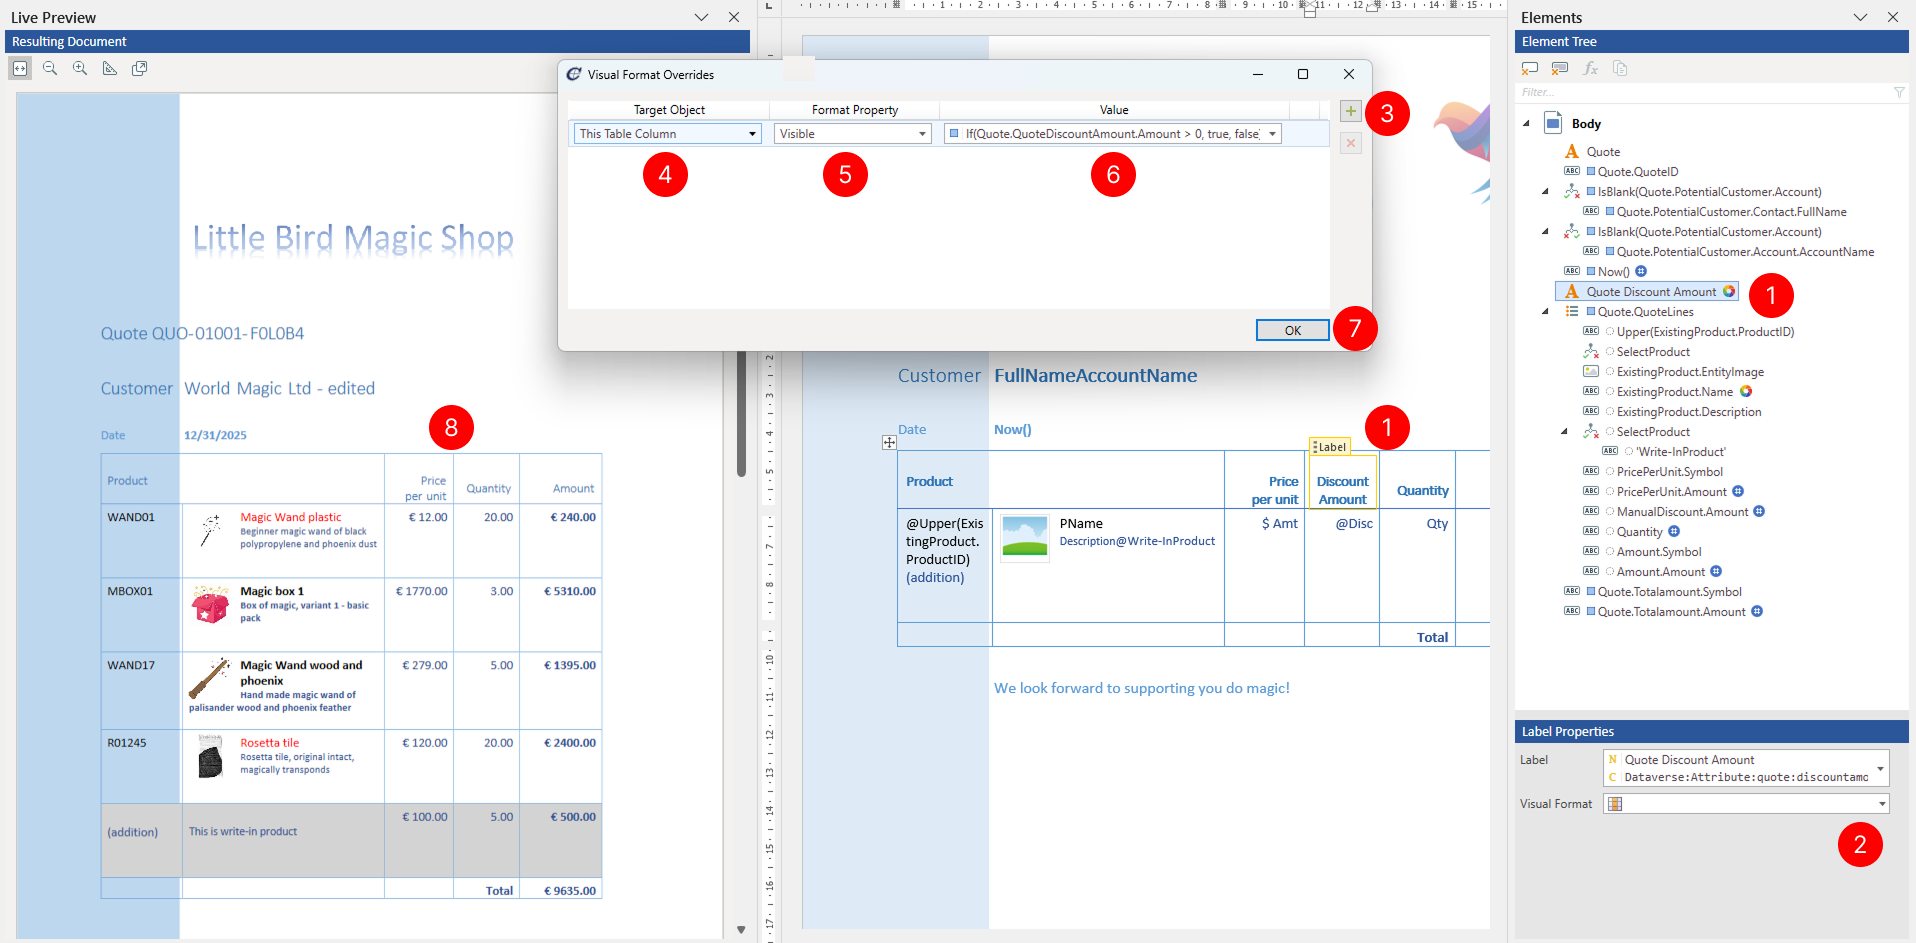
The visual formatting rule is now applied to the tagging element. When you preview or generate a document, the formatting expression will be evaluated and the resulting style will be applied to the template object.
Add multiple visual formatting rules
You can add multiple visual formatting rules to a single tagging element to create complex formatting scenarios.
Select the tagging element in your template or in the Elements pane.
In the Properties pane, locate the Visual formatting section to open Visual Format Overrides dialog.
Choose Add Visual Format Override (
) to create a new visual formatting rule.In the Target Object dropdown, select the template object to which the formatting applies (for example, Whole Table Row for table row formatting).
In the Format Property dropdown, select the property you want to control (for example, Background Color to control background color of table row).
In the Value Expression field, enter a Power Fx expression that returns the desired value. Choose the OK button to confirm the formatting rule. Repeat steps 3-6 to add additional formatting rules (see steps 6 and 7 for explanation) for other properties of the same or different template objects.
For example, below is the Power Fx expression that changes Background Color of the Whole Table Row if selected product is write-in product.
If(SelectProduct, //write-in product
  Color.LightGray, //set light grey table row background
  Blank() //don't change table row background color
)
TIP
If you want formatting to remain unchanged, use the
Blank()Power Fx function as return value in your expressions. If a Power Fx expression returnsBlank(), the visual formatting rule will not be applied and the original formatting set in the template will be preserved.In the Value Expression field, enter a Power Fx expression that returns the color to use for font color.
For example, below is the Power Fx expression will change TextColor property value of the Text inside the Field element based on product quantity on hand.
If(ExistingProduct.QuantityOnHand <= 0, // if quantity on hand for the product is below or equal to zero
  Color.Red, //make text inside field element red
  Color.Black //make text inside field element black
)
In the Value Expression field, enter a Power Fx expression that returns the whether or not to show font in bold or not.
For example, below is the Power Fx expression will change Bold property value of the This Table Cell Only based on product quantity on hand.
If(ExistingProduct.QuantityOnHand <= 0, // if quantity on hand for the product is below or equal to zero
  false, // keep this table cell content text normal, not bold
  true // make this table cell content text bold
)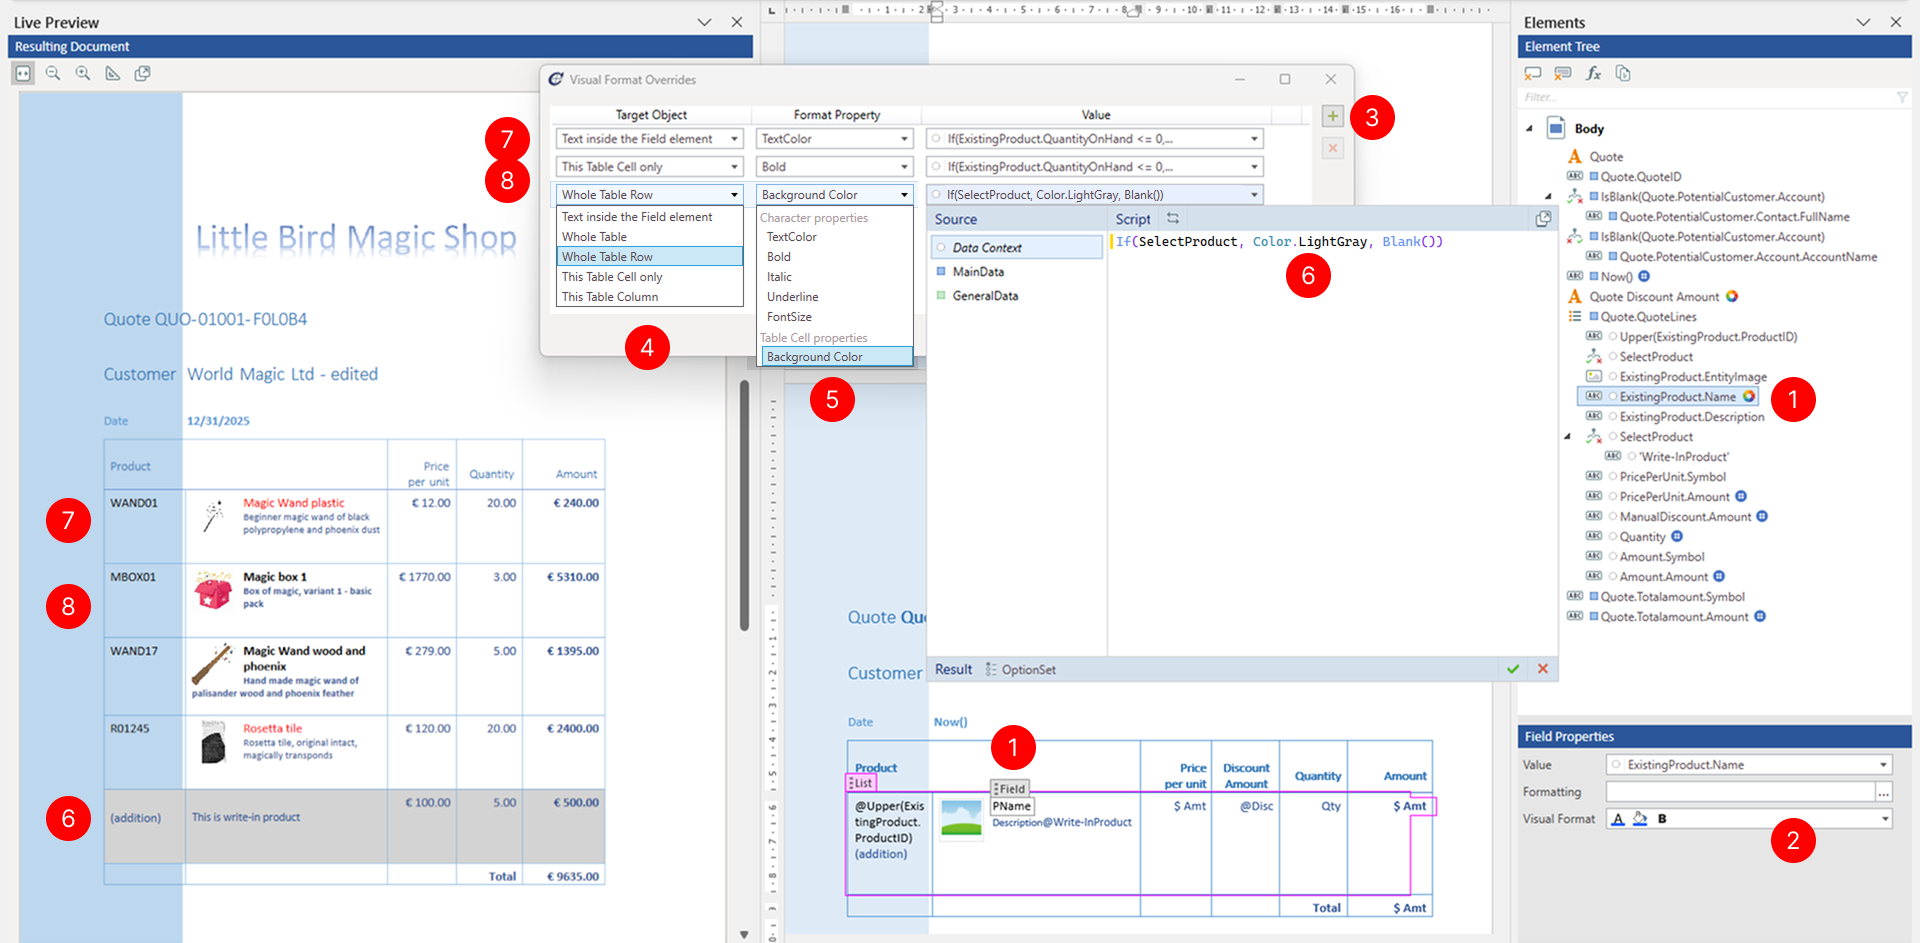
TIP
You can add multiple visual formatting rules to the same tagging element to control different properties. The rules are applied in the order they appear in the list.