Bind data to a tagging element
Data binding connects tagging elements in your Document Template to data fields or records from the Data Source. When you bind a tagging element, you specify which data from the Data Source should be inserted into the generated document. You can bind to data fields and records, or even write Power Fx formulas to perform complex calculations and data manipulations.
A binding is defined by two main components:
- Source - specifies the source from which to select data.
- Path or Script - specifies the exact data field or record within the selected source, or a Power Fx formula.
Prerequisites
- Template Designer installed. For more information, see Install Docentric Designer.
- A document template set up with a Data Source Package (DDSP) loaded. For more information, see Set up a document template.
- A tagging element inserted in your template. For more information, see Tagging elements overview.
- An Elements tree pane shown. For more information, see Elements tree pane
Bind a tagging element to a data field or record using a path
Most of the time, you will bind tagging elements to specific data fields or records from your Data Source.
- Select the tagging element to view its properties and select the Value property to open the value binding panel.
- Under Source, select the data section that contains your data:
- MainData - the primary data defined in the Data Model
- GeneralData - general data and information that does not belong to a specific entity
- Data Context - data context provided by a parent tagging element
- Enter name of a field or record to search in the data structure tree in the search box to quickly locate it in the tree.
- Under Path, navigate the data structure tree and select the specific data field or record.
- Once you select field or record result type will be shown in bottom left.
- Choose the OK button (
 ) to confirm the binding.
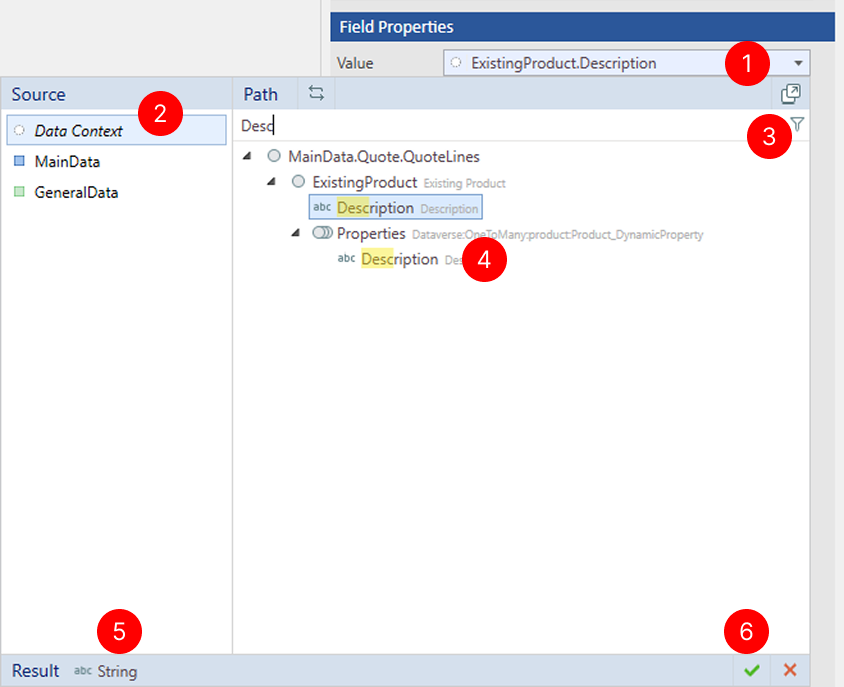
The tagging element is now bound to the selected data field or record. When you generate a document, the actual data value will replace the placeholder.
Bind tagging element to data using Power Fx expressions
If binding to data requires more than just selecting a field or record, you can write a formula in the form of a Power Fx expression. Power Fx is a low-code language used by Docentric Template Designer for data manipulation and calculations. It is the same language used across the Microsoft Power Platform.
To write a Power Fx expression for data binding, you can:
- Use the inline script editor for simple Power Fx expressions
- Use the full Power Fx editor for advanced and more complex formulas.
Bind using the Simple Power Fx Editor
- Select Path-Script switch button (
 ) to switch between static path and simple script expression binding and to edit your binding using simple script.
 - Enter your script expression in the editor. You can reference data fields and use basic operators.
- Choose the OK button () to confirm the binding.
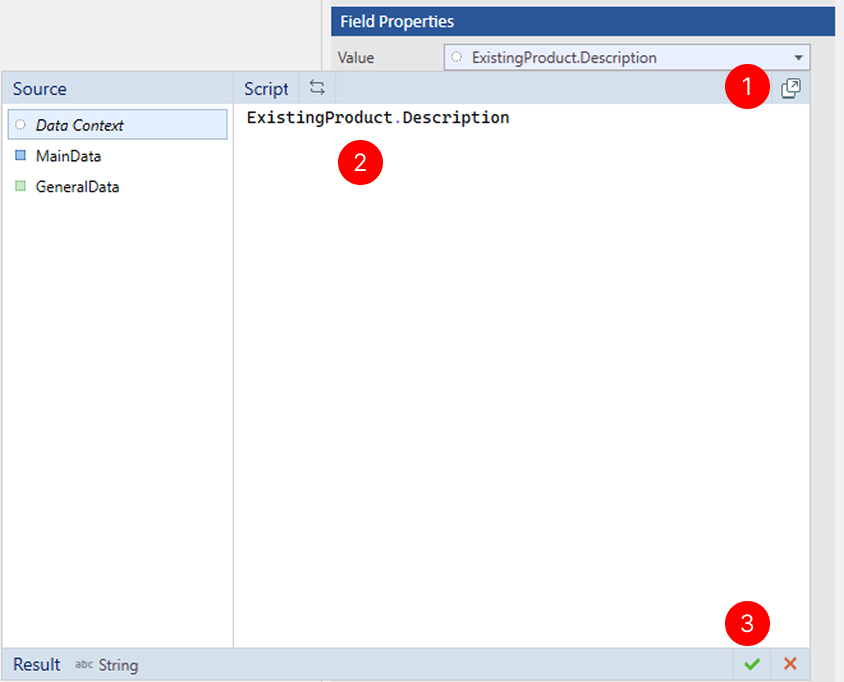
The tagging element is now bound to the selected data field or record. When you generate a document, the actual data value will replace the placeholder.
Bind using the Full Power Fx Editor
The full Power Fx editor provides a rich environment for writing complex Power Fx formulas for data binding. It has a bigger editing area, and provides help in the form of a list of available Power Fx functions.
- Select Open script editor button (
 ) or Edit value binding script button (
 ) or select Edit Expression from right-click menu to open Power FX script editor and to edit your binding using script editor.
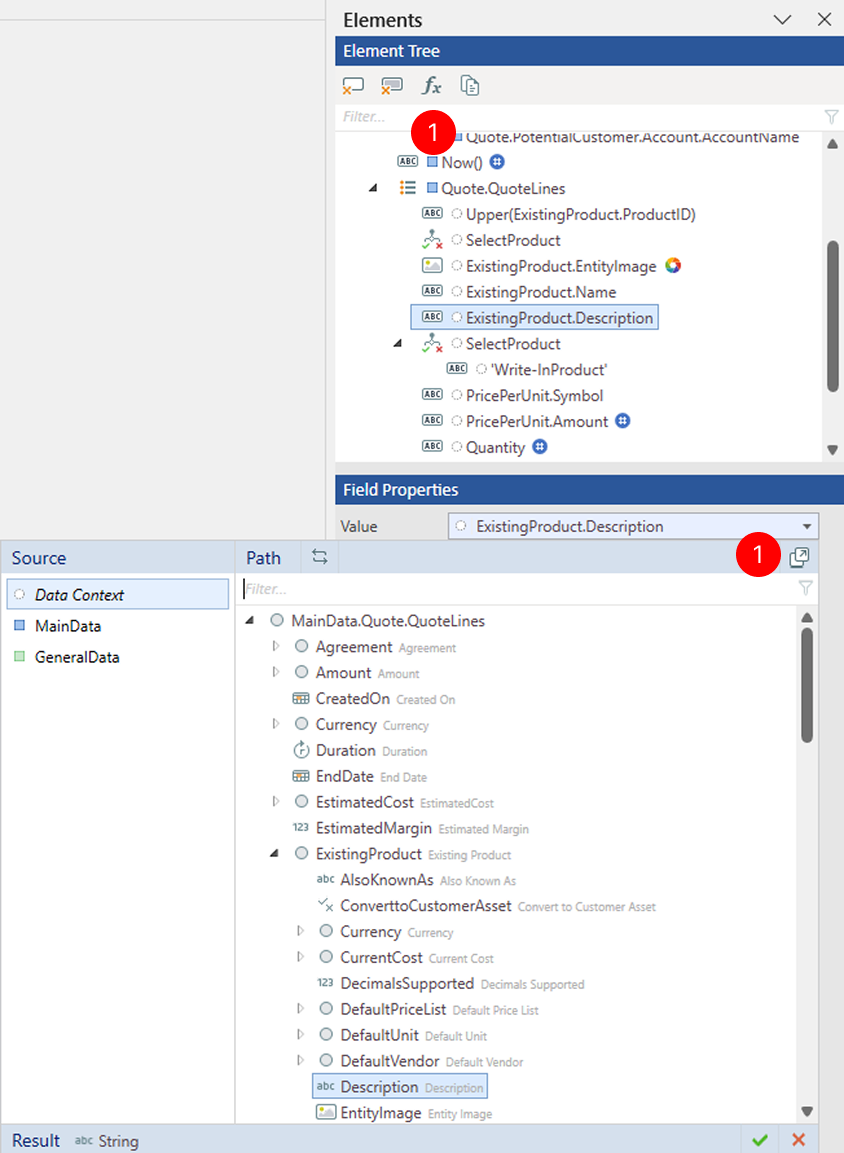
With your Power FX script editor open, follow next steps to enter formula.
- Enter your Power Fx formula in the editor. For more information, see Power Fx formulas.
- Browse the list of available Power FX functions you can use in your Power Fx formulas.
- During editing of your Power Fx formula, IntelliSense provides suggestions for available fields and functions.
- Choose the OK button () to confirm the binding.
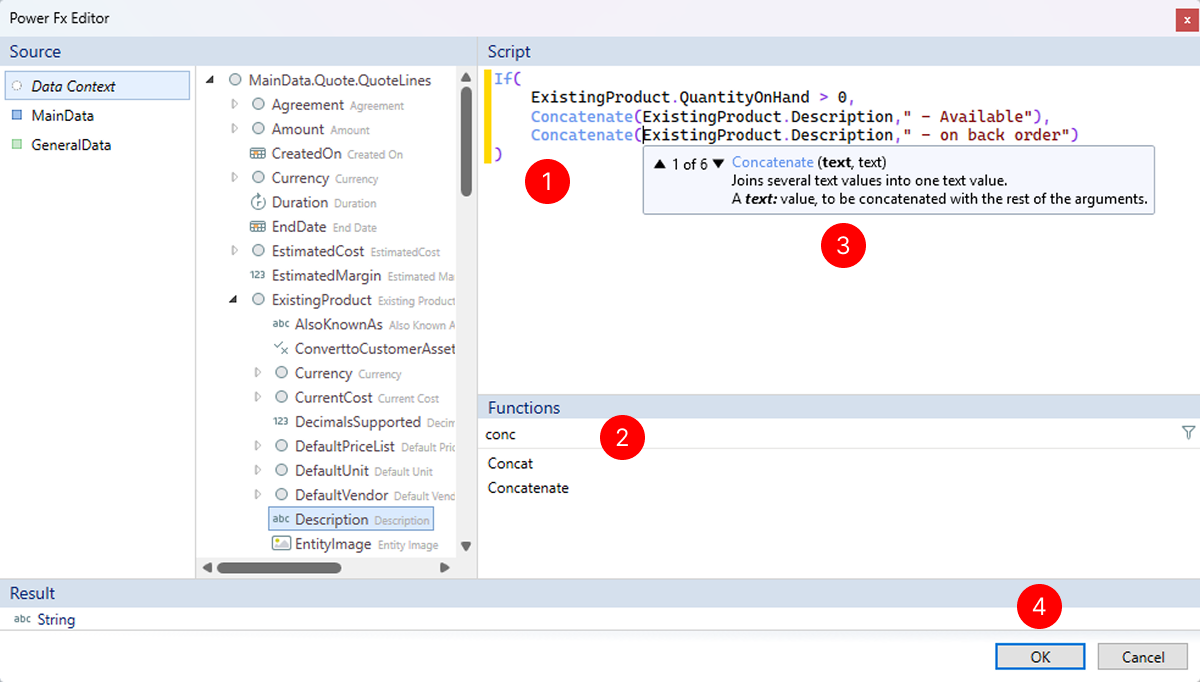
The tagging element is now bound to the Power Fx expression. When you generate a document, the Power Fx formula will be evaluated and its result will be used to replace the tagging element.
TIP
Use Ctrl+Alt+Enter to close Power FX script editor using keyboard.
Understand Data Context
Data Context lets a tagging element bind to a field of the record currently being processed by its parent element.
For example, a container tagging element, such as List, Group, or Context, tagging element processes one quote line at a time. For each iteration, that quote line becomes the Data Context for the tagging elements inside the container tagging element. A nested Field tagging element can therefore bind to fields such as Product Name, Quantity, or Price of the current quote line.
Select Data Context as the binding source when the value should come from the current record provided by a parent tagging element.
TIP
To access data outside the current Data Context, such as data from the document header while processing its lines, use the DataSources keyword in your Power Fx expression. For example, here's how to calculate the share each line amount contributes to the total amount:
//Round up calculated amount percentage
RoundUp(
  //Amount from current Data Context divided by TotalAmount from outside of current context (MainData.Quote)
  (ExtendedAmount.Amount / DataSources.MainData.Quote.TotalAmount.Amount) * 100
  //round to 2 decimals
  , 2)
Troubleshoot data binding
Cannot bind to a field inside a collection
Error message:
You cannot bind to field FieldName
Field CollectionField is a collection of RecordType records. You cannot continue directly from field CollectionField to FieldName because CollectionField is a record collection, not one RecordType.
Cause: This field belongs to each record in the selected record collection, not to the record collection itself. Because the tagging element is not inside a container tagging element that processes the record collection, there is no current record from which to read the field value, so the binding is not allowed.
Resolution:
- Insert a container tagging element, such as a List or Group, into your document template.
- Bind the container tagging element to the collection field.
- Nest the tagging element you want to bind inside the container tagging element.
- Bind the nested tagging element to the field, using Data Context as the source.
The container tagging element now provides the data context, so Template Designer knows which record to use for each iteration.
